 Pin Recipe
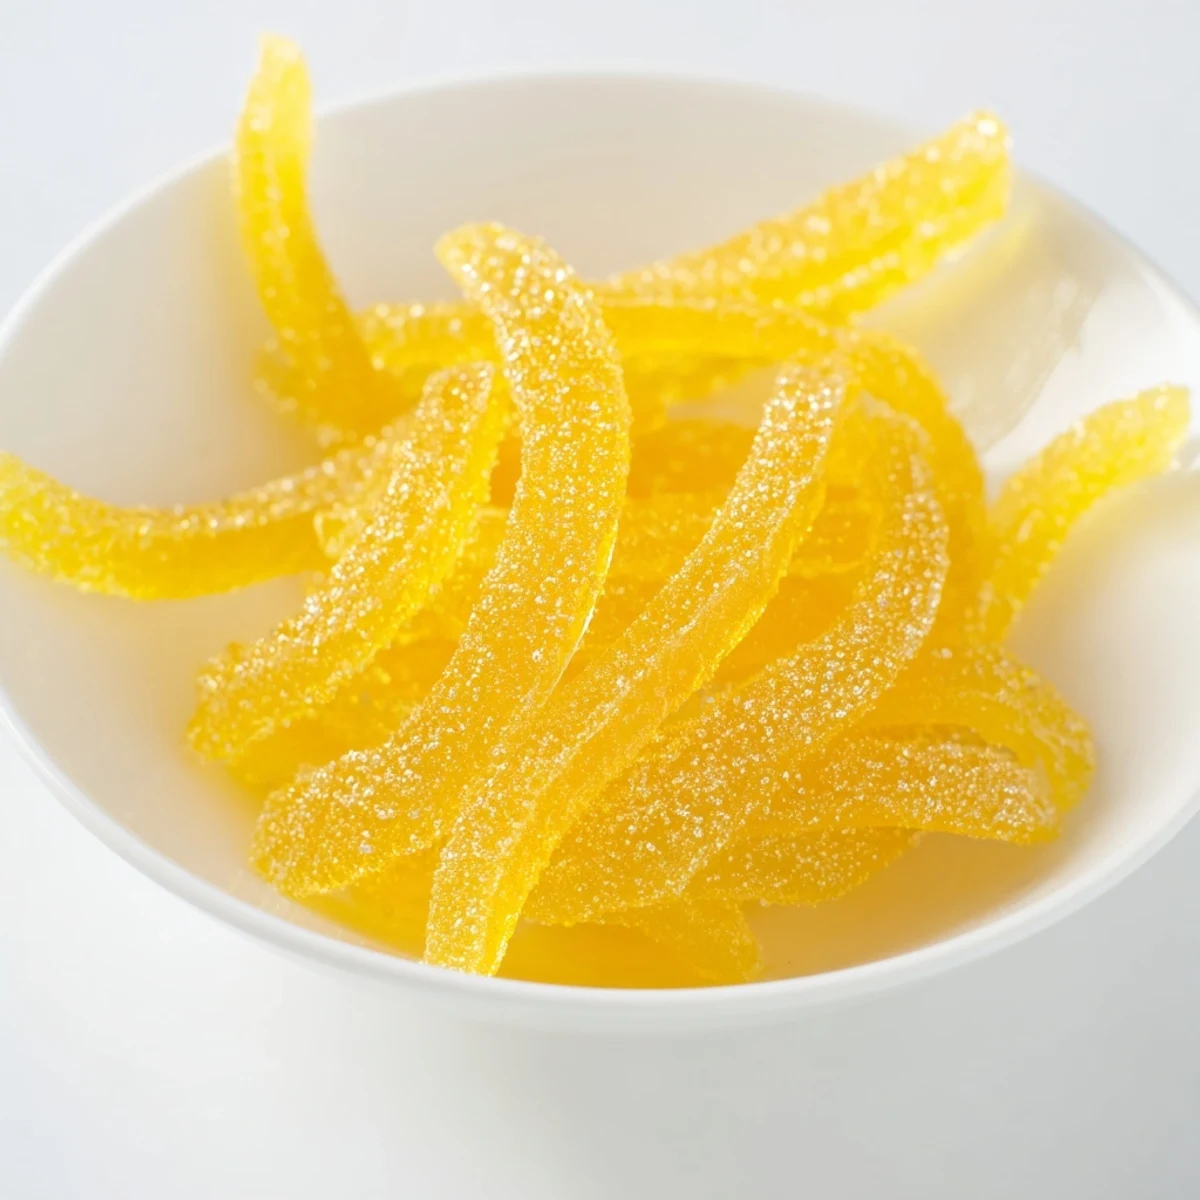
 Experience the vibrant flavor of lemon peel transformed into a sweet, zesty treat. Lemon strips are blanched to remove bitterness, simmered in sugar syrup until tender and translucent, then coated in granulated sugar to add a delightful crunch. This confectionery item is perfect for snacking, garnishing desserts, or adding a citrusy touch to cocktails. Easy to prepare and naturally vegan and gluten-free, it brings brightness and sweetness in every bite while providing a versatile use in your culinary adventures.
I discovered candied lemon peel years ago at a small bakery in southern France, where the owner's grandmother had been making them for decades. The moment I bit into one, I was captivated—that perfect balance of bitter, sweet, and tender that made me feel like I'd uncovered a secret. Now, whenever I make them in my own kitchen, the whole house fills with this bright, citrusy aroma that instantly transports me back to that narrow cobblestone street.
I'll never forget bringing a jar of these to my book club, and watching everyone's faces light up when they tasted them. One friend ate three pieces and immediately asked if I could make a bigger batch for her holiday gifts. That's when I realized these humble lemon peels had become something special in my kitchen repertoire.
Ingredients
- 3 large lemons (preferably organic, unwaxed): The foundation of everything. Organic lemons matter here because you're eating the peel, and you want to avoid any waxy coatings. I learned this the hard way after my first batch felt oddly slippery on the tongue.
- 1 cup (200 g) granulated sugar: This becomes your poaching syrup, gently coaxing the peels into translucence. Don't skip the gentle simmer—rushing this step results in peels that stay tough and bitter.
- 1 cup (240 ml) water: The vehicle that carries the sugar into every fiber of the peel. The ratio matters because you need enough liquid to keep the peels submerged.
- 1/2 cup (100 g) granulated sugar (for tossing): This final coating is what gives them that jewel-like sparkle. I save some coarser sugar crystals when I have them on hand—they catch the light beautifully.
Instructions
- Prepare your lemons:
- Wash and scrub the lemons thoroughly under running water. Using a sharp knife or vegetable peeler, remove the peel in wide strips, trying to leave as much of the white pith behind as possible. The pith is where a lot of bitterness lives, and we're trying to tame it, not amplify it. Your hands will smell gloriously lemony at this point.
- Slice into thin ribbons:
- Cut those peel strips into thin ribbons about 1/4-inch (0.5 cm) wide. This is where patience pays off—thinner strips will candy more evenly and have a better texture. I like to arrange them in a neat pile as I go, which makes the next step easier.
- Blanch away the bitterness:
- Place the strips in a saucepan and cover them with cold water. Bring to a rolling boil and let them bubble for 2 minutes, then drain completely. This is crucial. Repeat this blanching process two more times with fresh water each time. You're essentially giving the peels a gentle shock therapy that removes the harsh, astringent bite. By the third round, the water should look almost clear instead of cloudy and bitter-looking.
- Create your syrup:
- In your cleaned saucepan, combine 1 cup of sugar and 1 cup of water. Put it over medium heat and stir occasionally until every grain of sugar has dissolved. The mixture should look like liquid gold. Don't skip stirring—you want a fully dissolved, clear syrup before you add the peels.
- Poach the peels to translucence:
- Gently add your blanched lemon peel strips to the simmering syrup. Reduce the heat to low and let them bubble away softly for 35 to 45 minutes. Stir occasionally and watch as something magical happens—the peels gradually become translucent, tender, and glossy. This is when you know the sugar has fully penetrated them. If you hold a piece up to the light, you should be able to almost see through it.
- Drain and cool slightly:
- Using a slotted spoon, carefully transfer the candied peels to a wire rack that's sitting over parchment paper or a tray. Let them cool for about 10 to 15 minutes until they're no longer scorching hot, but still slightly warm and sticky to the touch. This is the ideal moment for the next step.
- Coat in sugar:
- Toss your warm peels in the remaining 1/2 cup of sugar, making sure each piece gets a good coating. Work quickly while they're still a bit tacky, as this helps the sugar adhere. Spread them back out on your wire rack in a single layer so nothing is touching.
- Let them dry completely:
- This is the hardest part—patience. Leave those peels undisturbed for at least 4 hours, but ideally overnight. They should lose their stickiness and develop a delicate crystallized coating. If they're still tacky after 4 hours, give them more time. A fan nearby can speed things up slightly.
 Pin Recipe
 My sister served these at her wedding as edible favors, individually wrapped in parchment and tied with ribbon. Watching guests discover something homemade and delicious in their favor bag made me realize how much joy these simple peels could bring. That day, they became more than just candy—they became tokens of care.
Storage & Shelf Life
Once they're completely dry and crystallized, transfer your candied lemon peels to an airtight container at room temperature. They'll keep beautifully for up to 2 weeks, though honestly, they rarely last that long in my house. If you live somewhere humid, toss a silica gel packet in the container to keep them dry and crispy.
Variations & Creative Uses
Once you've mastered the basic technique, the possibilities expand. I've made batches with orange and grapefruit peels using the exact same method, and each brings its own character to the table. The orange version is slightly more perfumed, while grapefruit adds an intriguing subtle bitter note that sophisticated palates adore.
For presentation and gifting, consider dipping each candied peel halfway into melted dark chocolate—let it cool on parchment until set. They become instantly more decadent and make a stunning gift. I also love scattering them over vanilla cake frosting, using them to garnish cocktails for dinner parties, or tucking them into cookie boxes.
Why This Recipe Works
There's a reason candied citrus peel has endured for centuries. The technique is simple but respectful of the ingredient—you're not masking the lemon's essential character, you're coaxing it into something more refined. The careful blanching removes bitterness while the gentle poaching transforms tough pith into something silky and yielding. What results is a confection that tastes almost impossibly good for how straightforward it is to make.
- The blanching process is absolutely non-negotiable for tender, palatable results.
- Low heat during the poaching phase prevents the sugar from crystallizing prematurely and ensures even candying.
- Full drying time in a cool, dry space creates that signature crispy-on-the-outside texture that makes these so addictive.
 Pin Recipe
 Making candied lemon peel is pure alchemy in slow motion. You start with something that seems inedible and end with something precious. That transformation, combined with how universally loved these are, makes this my favorite kitchen project on quiet afternoons.
Recipe FAQs
- → How do you remove the bitterness from lemon peel?
-
Boil the lemon peel strips in water three times, draining and refreshing the water each time to reduce bitterness effectively.
- → What is the best way to store the candied lemon peel?
-
Store in an airtight container at room temperature to maintain freshness for up to two weeks.
- → Can I use other citrus fruits besides lemons?
-
Yes, orange or grapefruit peels work well as alternatives for a different citrus flavor profile.
- → What tools are essential for preparation?
-
A sharp knife or vegetable peeler to remove the peel, a saucepan for simmering, a slotted spoon, wire rack, and parchment paper or tray for drying are recommended.
- → How can I add extra flavor to the candied peels?
-
Dip the dried peels halfway in melted dark chocolate for a rich and decadent twist.
