 Pin Recipe
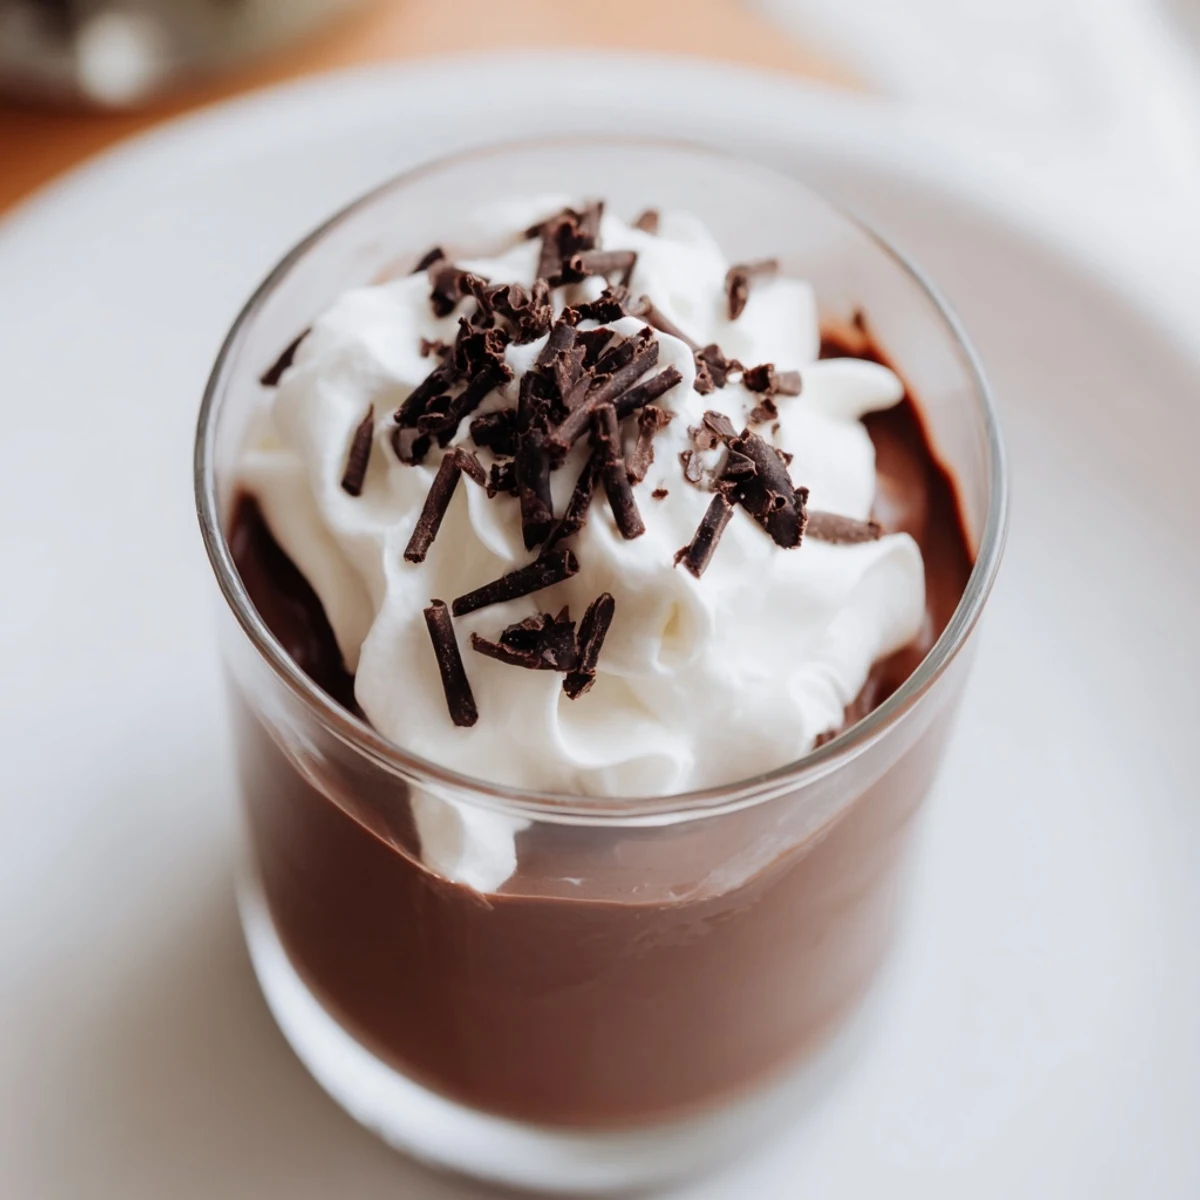
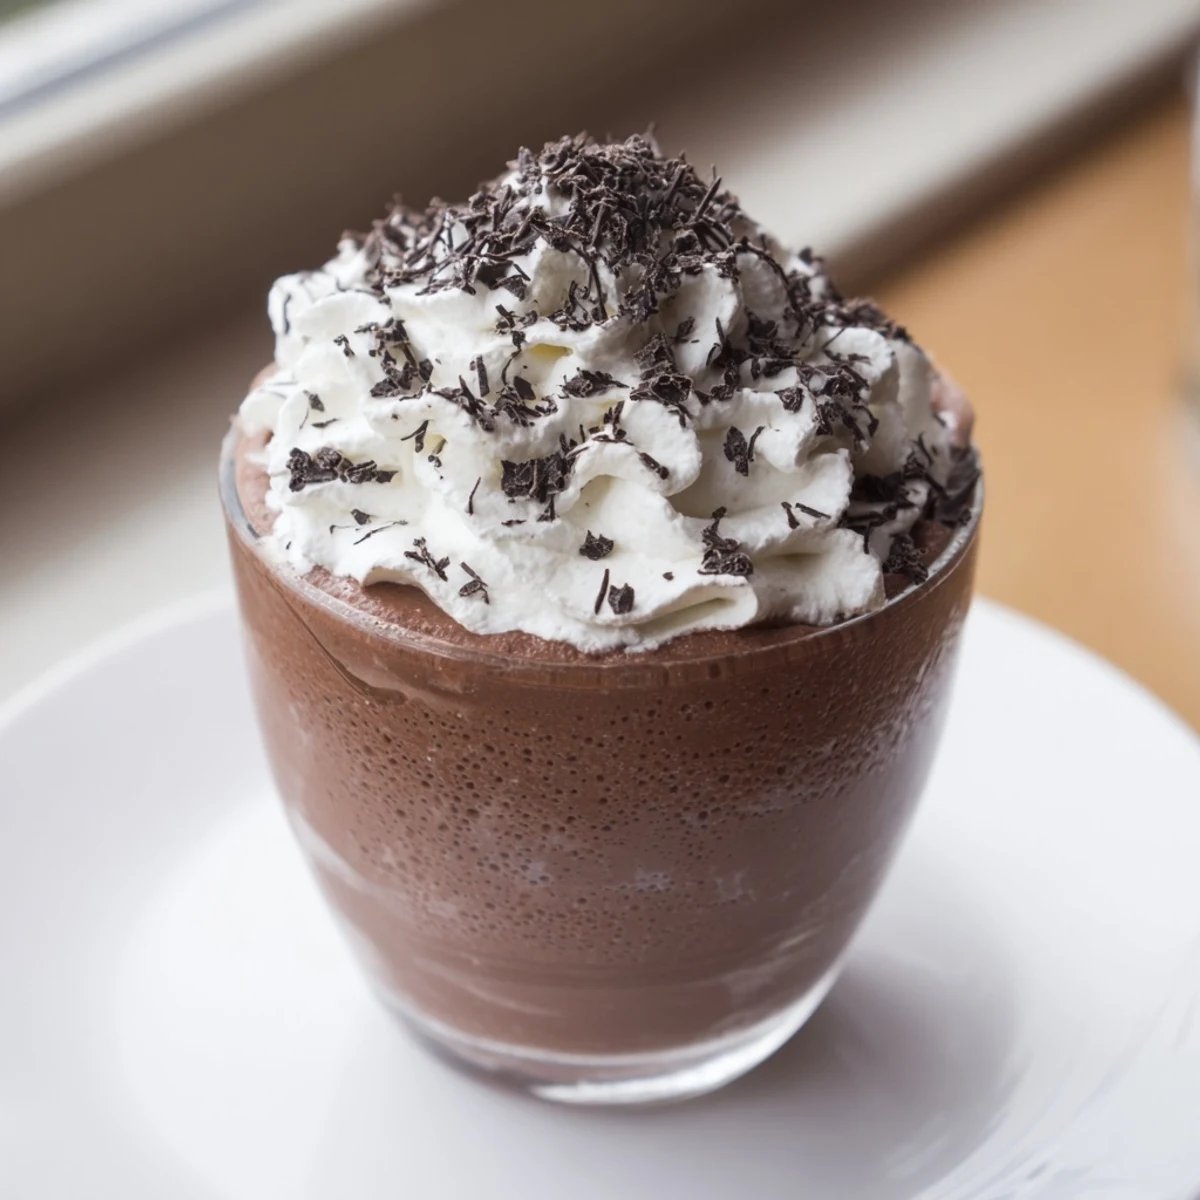
 This rich, creamy chocolate dessert is crafted by slowly cooking a blend of cocoa, sugar, and dairy until thickened, then combined with melted chocolate and vanilla. After pouring into individual cups, it chills for an hour to set perfectly. The final touch includes optional whipped cream and chocolate shavings for a velvety finish. This easy-to-make treat balances deep cocoa flavor with smooth texture, making it a delightful indulgence.
There's something about chocolate pudding that takes me back to my grandmother's kitchen on rainy afternoons. She'd make this the old-fashioned way, and I'd watch the cocoa powder swirl into the milk like magic, transforming into something velvety and luxurious. Years later, I realized she wasn't doing anything complicated—just understanding that the best desserts come from patience and a few quality ingredients. This pudding reminds me that sometimes the most satisfying moments happen in the simplest dishes.
I remember making this for my partner on a Tuesday night when we both needed comfort food. The smell of chocolate filling the kitchen was enough to shift the whole mood of the evening. We sat down with our cups, and suddenly the week didn't feel so heavy. That's when I understood—this pudding isn't just dessert, it's a small act of care.
Ingredients
- Whole milk: This is your base, and using whole milk instead of skim makes all the difference in creaminess. Don't skip this step
- Heavy cream: This luxurious addition is what separates homemade pudding from the boxed version. It adds richness that lingers on your palate
- Semisweet chocolate, chopped: Chopping it yourself rather than using chips helps it melt more smoothly and evenly. Quality matters here because chocolate is the star
- Unsweetened cocoa powder: The Dutch-processed kind gives deeper color and flavor, though regular cocoa powder works too
- Granulated sugar: This sweetens the mixture while the cocoa powder provides the depth. The balance between the two is what makes this sing
- Cornstarch: This is your thickening agent—it creates that spoonable consistency without any grittiness. Whisk it well to avoid lumps
- Salt: A tiny pinch actually makes the chocolate flavor pop more dramatically than you'd expect
- Vanilla extract: Added at the end to preserve its delicate flavor. It rounds out the chocolate beautifully
- Whipped cream and chocolate shavings: These optional toppings are optional only in name—they turn simple into special
Instructions
- Create your dry base:
- In a medium saucepan, whisk together the sugar, cocoa powder, cornstarch, and salt. Take your time here, breaking up any cocoa lumps against the side of the pan. This prevents them from hiding in your finished pudding
- Build your mixture:
- Slowly pour in the milk and cream while whisking constantly. Go slowly—this is where patience prevents lumps. The mixture will look thin and unremarkable at first, but trust the process
- Apply gentle heat:
- Place the saucepan over medium heat and whisk constantly. You're looking for the moment it starts to steam and bubble slightly, which typically takes seven to ten minutes. The mixture will transform from thin to luxuriously thick. You'll feel it change under your whisk
- Melt in the chocolate:
- Remove from heat immediately once it's thickened. Add your chopped chocolate and let it sit for a moment before whisking. The residual heat melts it perfectly. Keep whisking until you have a glossy, smooth mixture with no chocolate bits remaining
- Add the finish:
- Stir in the vanilla extract. That moment when the vanilla aroma rises from the pan is when you know you're close
- Transfer to cups:
- Pour the warm pudding into four serving cups. This is the satisfying part—watching something homemade go into its final form
- Prevent the skin:
- Press a piece of plastic wrap directly onto the surface of each pudding. This sounds fussy, but it prevents that papery skin from forming that nobody enjoys
- Chill thoroughly:
- Refrigerate for at least one hour. This waiting period is worth it—the pudding sets to perfect spoonability and the flavors deepen
- Garnish and serve:
- Top with whipped cream and chocolate shavings if desired. This final touch transforms it from homemade to restaurant-quality
 Pin Recipe
 I once served this at a dinner party where someone asked for the recipe, and I watched their face when I told them how simple it was. They'd assumed something this good required magic or culinary school. That moment made me realize homemade pudding is one of those dishes that feels like a secret—not because it's complicated, but because so few people bother to make it anymore.
Choosing Your Chocolate Personality
The chocolate you choose defines the character of this pudding. Semisweet chocolate is the reliable friend—familiar, balanced, never disappointing. But if you're feeling adventurous, dark chocolate makes this pudding intense and almost sophisticated, perfect for serious chocolate lovers. Milk chocolate, on the other hand, leans sweet and creamy, ideal if you're serving people who prefer gentler flavors. I've made it three ways, and each tells a different story. The technique never changes, but the personality absolutely does. Trust your mood and your palate.
Making It Your Own
Once you understand the basic technique, this pudding becomes a canvas for creativity. A pinch of espresso powder in the dry ingredients deepens the chocolate so beautifully you almost can't identify what you're tasting—just that it's more. A hint of cinnamon or cayenne adds complexity. Some evenings I've added a tablespoon of coffee liqueur or a splash of bourbon to the finished pudding. Each time, the pudding absorbs the addition and makes it feel intentional and special. This is the beauty of homemade—you control the story.
Serving and Storage Wisdom
These puddings are best served within two days, kept covered in the refrigerator where the plastic wrap continues protecting them. The flavor actually deepens slightly overnight as the ingredients settle together. Cold pudding is the traditional way, but I've learned that slightly warm pudding—just removed from the fridge a few minutes—has an almost melting quality that's hard to resist. Let your own preferences guide you here. There's no wrong way to enjoy something this good.
- For dairy-free versions, use full-fat coconut milk in place of the milk and cream—it creates the same luxurious texture
- Dress them up with crushed cookies, fresh berries, or a drizzle of chocolate sauce depending on your mood
- Make these the morning of serving for maximum freshness, or up to two days ahead for convenience
 Pin Recipe
 Chocolate pudding is proof that the best comfort food doesn't need to be complicated. Every time you make it, you're continuing a tradition that goes back generations of people who understood that simple care tastes better than anything fancy.
Recipe FAQs
- → What type of chocolate works best?
-
Semisweet chocolate offers a balanced flavor, but dark chocolate intensifies richness while milk chocolate sweetens it. Choose based on your preference.
- → Can I use dairy alternatives?
-
Yes, coconut milk and dairy-free chocolate can substitute traditional ingredients for a dairy-free option without compromising creaminess.
- → How do I prevent a skin from forming?
-
Pressing plastic wrap directly onto the surface while chilling helps prevent a film from developing on top.
- → How long should it chill?
-
Chilling for at least one hour allows the mixture to set into a smooth, creamy consistency.
- → Any tips to enhance flavor?
-
A small pinch of espresso powder can deepen the chocolate notes without adding coffee taste.
