 Pin Recipe
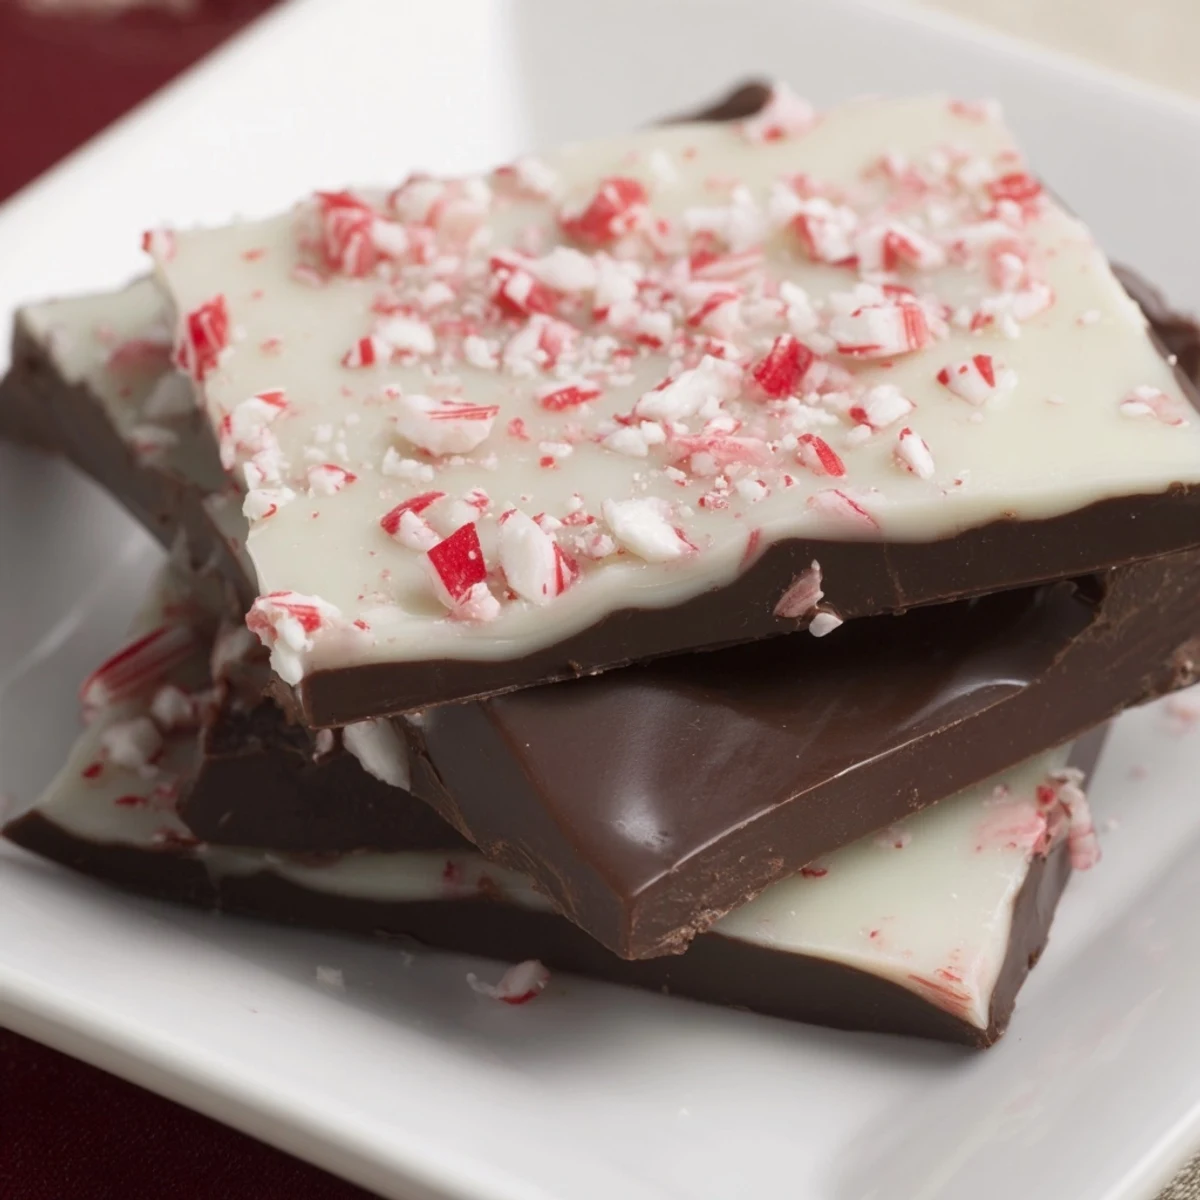
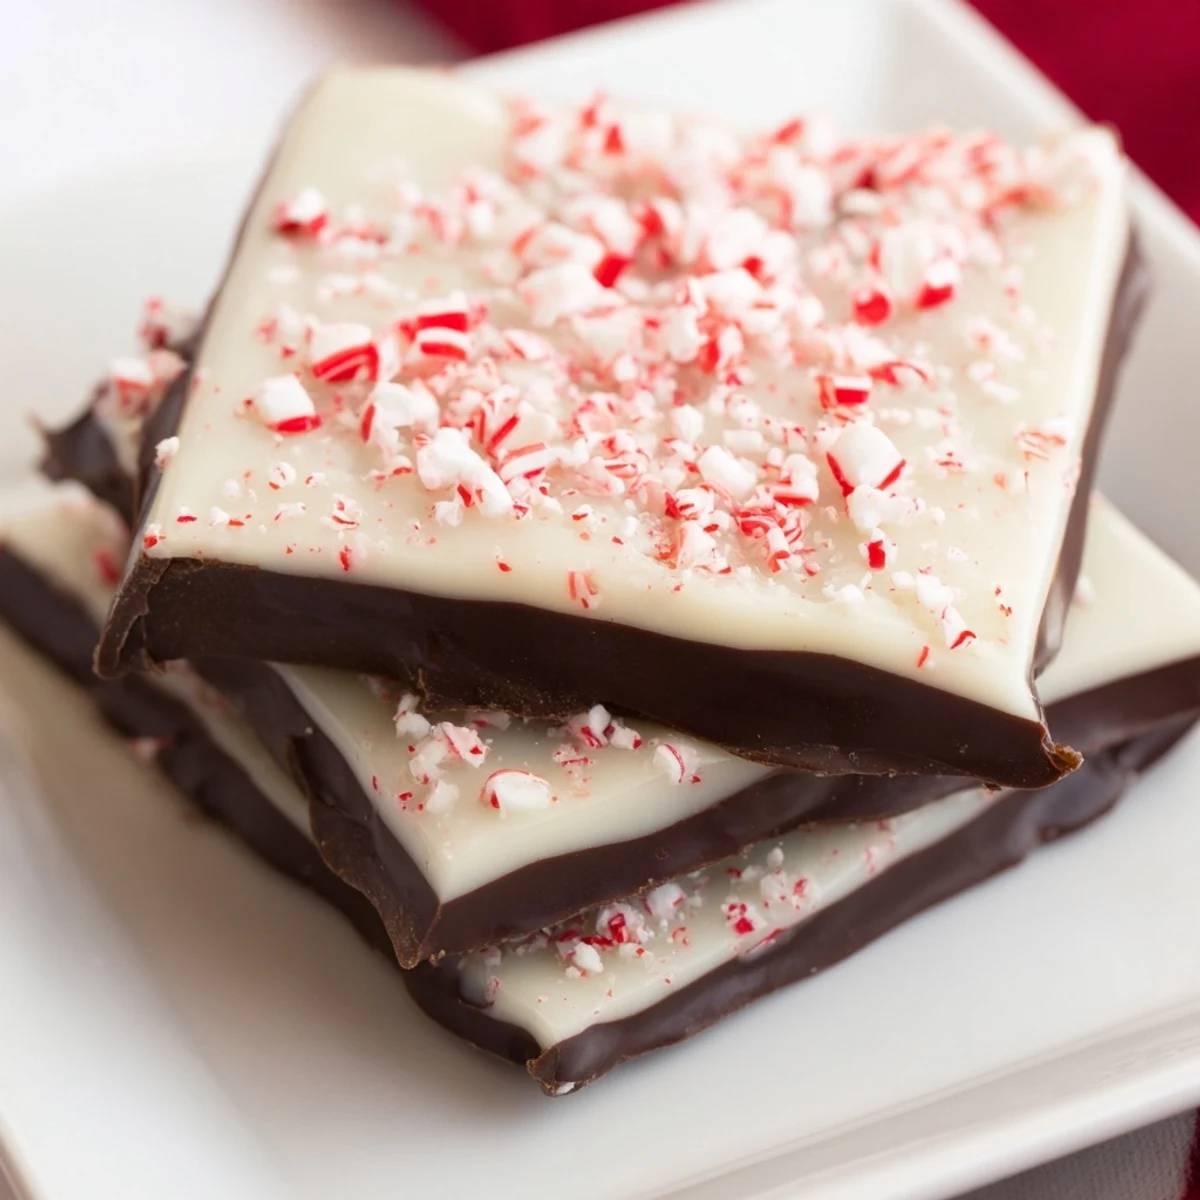
 This festive treat features smooth layers of rich dark and creamy white chocolate, topped with crunchy crushed peppermint candy canes. Using high-quality chocolate ensures smooth melting and a refined taste. The preparation involves melting each chocolate layer separately, chilling to set, then layering and adding peppermint candy on top before a final chill. Perfectly portioned for gifting or enjoying during holiday seasons, this confection offers a balance of sweet chocolate and refreshing mint.
Optional peppermint extract can be added to intensify the mint flavor. Serving chilled enhances the snap and texture. Store pieces in an airtight container at room temperature to maintain freshness up to two weeks. Ideal for those who enjoy a sweet, mint-infused layered treat with a satisfying crunch.
I still remember the first time I made peppermint bark from scratch in my tiny apartment kitchen. It was early December, and I'd just discovered that something so fancy and impressive could come together in under an hour with just three ingredients. My friend Sarah arrived unannounced that afternoon, and when she saw the dark and white chocolate layers glistening on my counter with crushed candy canes scattered across the top, her face lit up. That's when I realized this humble confection had become my secret weapon for making people feel special during the holidays.
I'll never forget bringing a batch to my office party last year. My coworker Marcus, who's usually pretty reserved, actually closed his eyes for a second after his first bite and said, 'Okay, but like, how is this even real?' That moment made me understand that peppermint bark isn't just candy—it's permission to give people something that tastes like the holidays feel.
Ingredients
- 200 g high-quality dark chocolate (60–70% cocoa): This is where the magic starts. Don't use cheap chocolate or chips—they'll be grainy and won't set right. I learned this the hard way when my first batch looked cloudy instead of glossy. Good chocolate melts silky smooth and sets with that satisfying snap.
- 200 g high-quality white chocolate: The creamy contrast layer that makes every bite interesting. White chocolate is trickier to melt because it burns easily, so patience here pays off.
- 6 peppermint candy canes (crushed): This is your textural surprise and your flavor punch all at once. I crush mine in a food processor for even pieces, but honestly, a sealed bag and a rolling pin works just as well and is kind of meditative.
- ½ tsp peppermint extract (optional): Only use this if you want to lean deeper into the peppermint flavor. The candy canes give plenty of flavor on their own, so this is really just for people who want to wake up their taste buds.
Instructions
- Set up your stage:
- Line your baking sheet with parchment paper. This is non-negotiable—it's the only thing standing between you and chocolate permanently attached to a pan. I use a 9x13 inch sheet because it gives you that perfect thickness that feels substantial without being overwhelming.
- Melt the dark chocolate like you mean it:
- Use a double boiler (a bowl over simmering water) or microwave in 30-second bursts, stirring between each one. The microwave is faster, but I use the double boiler because I love watching chocolate transform from chunks to glossy liquid. If you're using peppermint extract, stir in ¼ teaspoon now.
- Spread your first layer:
- Pour that melted dark chocolate onto your prepared sheet and spread it evenly until it's about ¼ inch thick. Use an offset spatula if you have one, but a regular one or even the back of a spoon works. The goal is smooth and even, not perfect.
- Chill and be patient:
- Refrigerate for 15–20 minutes until it's completely set. This is when you can clean your bowl, take a breath, and get ready for the next layer. Don't skip this step—rushing here means your layers might blend together instead of staying distinct.
- Melt the white chocolate with care:
- White chocolate is more delicate than dark, so go low and slow. Use the same method as before, but check it more frequently. It can go from melted to scrambled faster than you'd think. Add the remaining ¼ teaspoon of peppermint extract if you're using it.
- Layer number two:
- Pour the white chocolate over your set dark layer and spread it evenly. This is where an offset spatula really shines if you have one, but any smooth spreading tool does the job. Aim for the same thickness as your first layer so each bite has a balanced chocolate moment.
- The peppermint crown:
- Immediately—and I mean right now while the white chocolate is still tacky—sprinkle your crushed candy canes all over the surface. Then gently press them in with the palm of your hand or the bottom of a spoon so they actually stick instead of sliding off later.
- The final chill:
- Refrigerate for at least 30 minutes until everything is completely set. If you're feeling fancy, you can go longer. Some people swear by overnight chilling for maximum snap.
- Break it apart:
- Once it's set, you can break it into pieces with your hands for that rustic look, or cut it into neat squares with a sharp knife (heating the knife under hot water helps). Either way, you've just made something that looks like it came from a fancy chocolatier.
 Pin Recipe
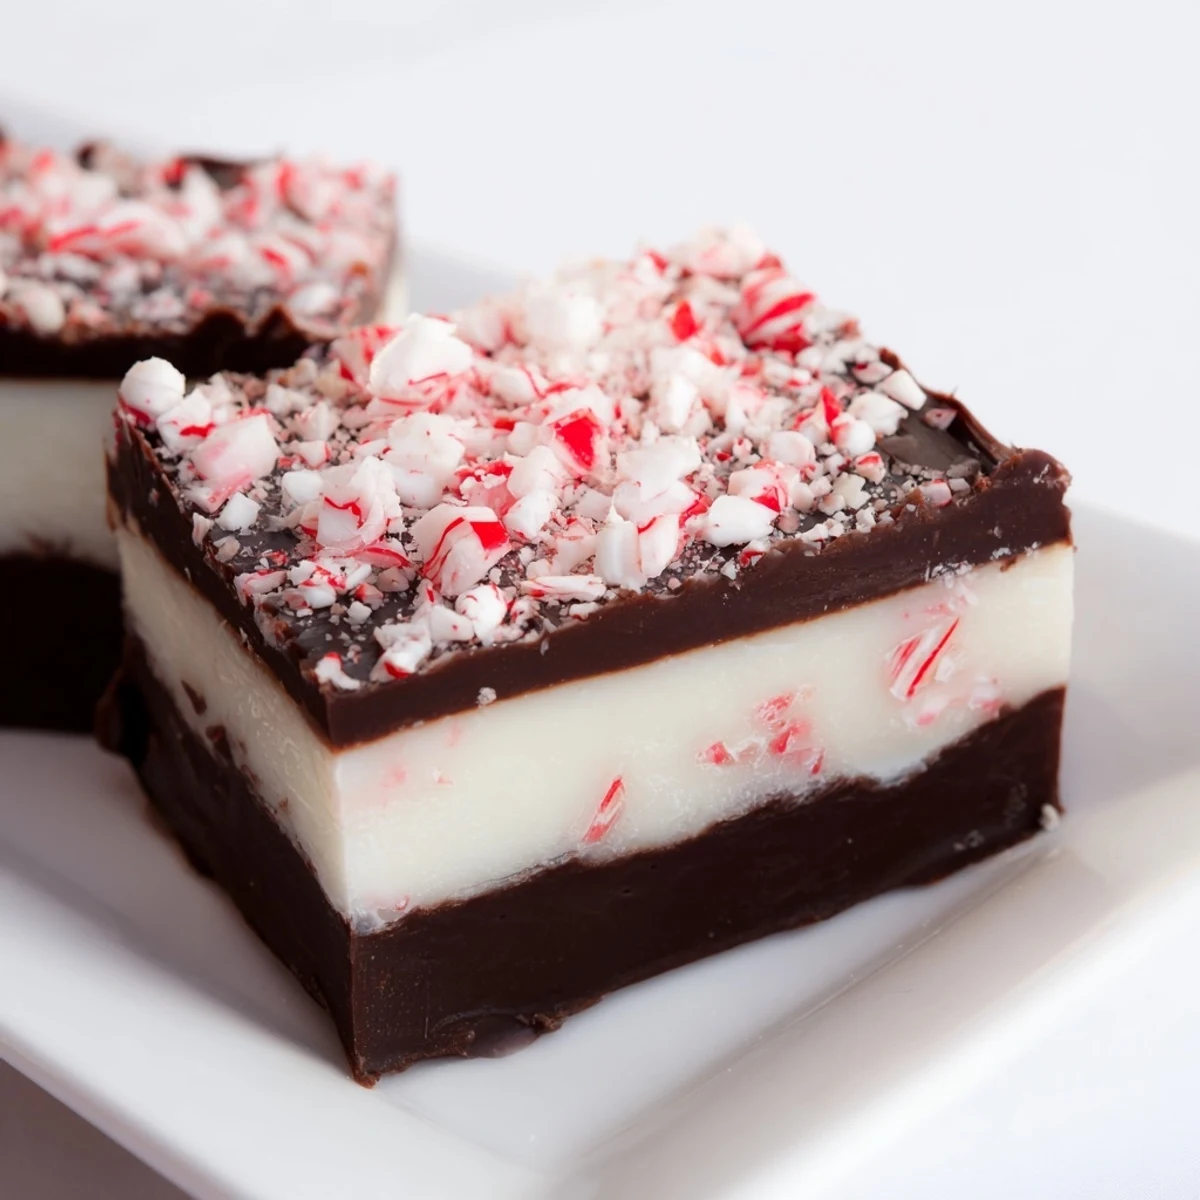
 There's something almost magical about the moment when you pull a finished batch of peppermint bark out of the fridge and see those three distinct layers stacked up like a delicious edible architecture project. You'll want to make batch after batch, and honestly, that's not a problem because they keep beautifully and make incredible gifts.
The Secret to Perfect Layers
The real trick to peppermint bark that impresses people isn't technique—it's understanding that each layer needs to be its own moment. When I rushed my first batch, I didn't wait long enough between layers, and everything sort of merged together into a muddy mess. Now I set a phone timer for 15 minutes and actually use those minutes to clean up, or better yet, to sit with a cup of tea and anticipate how good this is about to taste. The waiting is part of the recipe, not a delay in the recipe. Your future self will thank you for this discipline.
Customization and Variations
Once you've made this once, you'll start getting ideas. Some people go half dark, half white for a marbled effect by dragging a knife through the layers before they set. Others swap in milk chocolate for white chocolate if they want something richer. I've even seen versions with crushed candy canes mixed into the white chocolate layer for extra minty distribution. The beautiful thing about peppermint bark is that it's forgiving enough to handle your creative impulses while being delicious enough to taste like you know what you're doing.
Storage and Gifting Ideas
Here's where peppermint bark becomes your secret holiday weapon. Stored in an airtight container at cool room temperature, it keeps for up to two weeks, which means you can make it days in advance without stress. Layer it in a clear container with parchment between each piece, add a nice ribbon, and you've got a gift that looks handmade and thoughtful. I once gave a batch to my dentist's office and became their favorite patient—and yes, I see the irony. People remember homemade chocolate. People remember effort. People remember being thought of.
- Wrap pieces individually in small cellophane bags if you're doing bulk gifting—it looks extra special and keeps everything fresh
- Make it ahead and freeze it if you need to—it actually comes out of the freezer with an even more satisfying snap than fresh
- Keep a batch in your fridge during December for whenever you need to impress someone last minute, because you will
 Pin Recipe
 Peppermint bark is proof that the simplest ideas often taste the best. Make this, share it, watch people's faces, and remember that you did that with chocolate, peppermint, and about an hour of your time.
Recipe FAQs
- → What type of chocolate works best?
-
Use high-quality dark and white chocolate (60–70% cocoa recommended) for smooth melting and optimal flavor.
- → Can I add extra mint flavor?
-
Yes, adding a small amount of peppermint extract to the melted chocolate layers enhances the minty taste.
- → How should I crush the peppermint candies?
-
Place the candy canes in a sealed bag and gently crush them with a rolling pin or spoon to avoid scattering.
- → How long does it take to set?
-
Each chocolate layer chills for about 15–20 minutes, with a final chilling step of 30 minutes until fully set.
- → What is the best way to store the finished product?
-
Store in an airtight container at cool room temperature. It lasts up to two weeks without loss of texture or flavor.
- → Can milk or gluten-free chocolate be used?
-
Yes, milk chocolate variants can be substituted. For gluten-free options, ensure all ingredients are certified gluten-free.
