 Pin Recipe
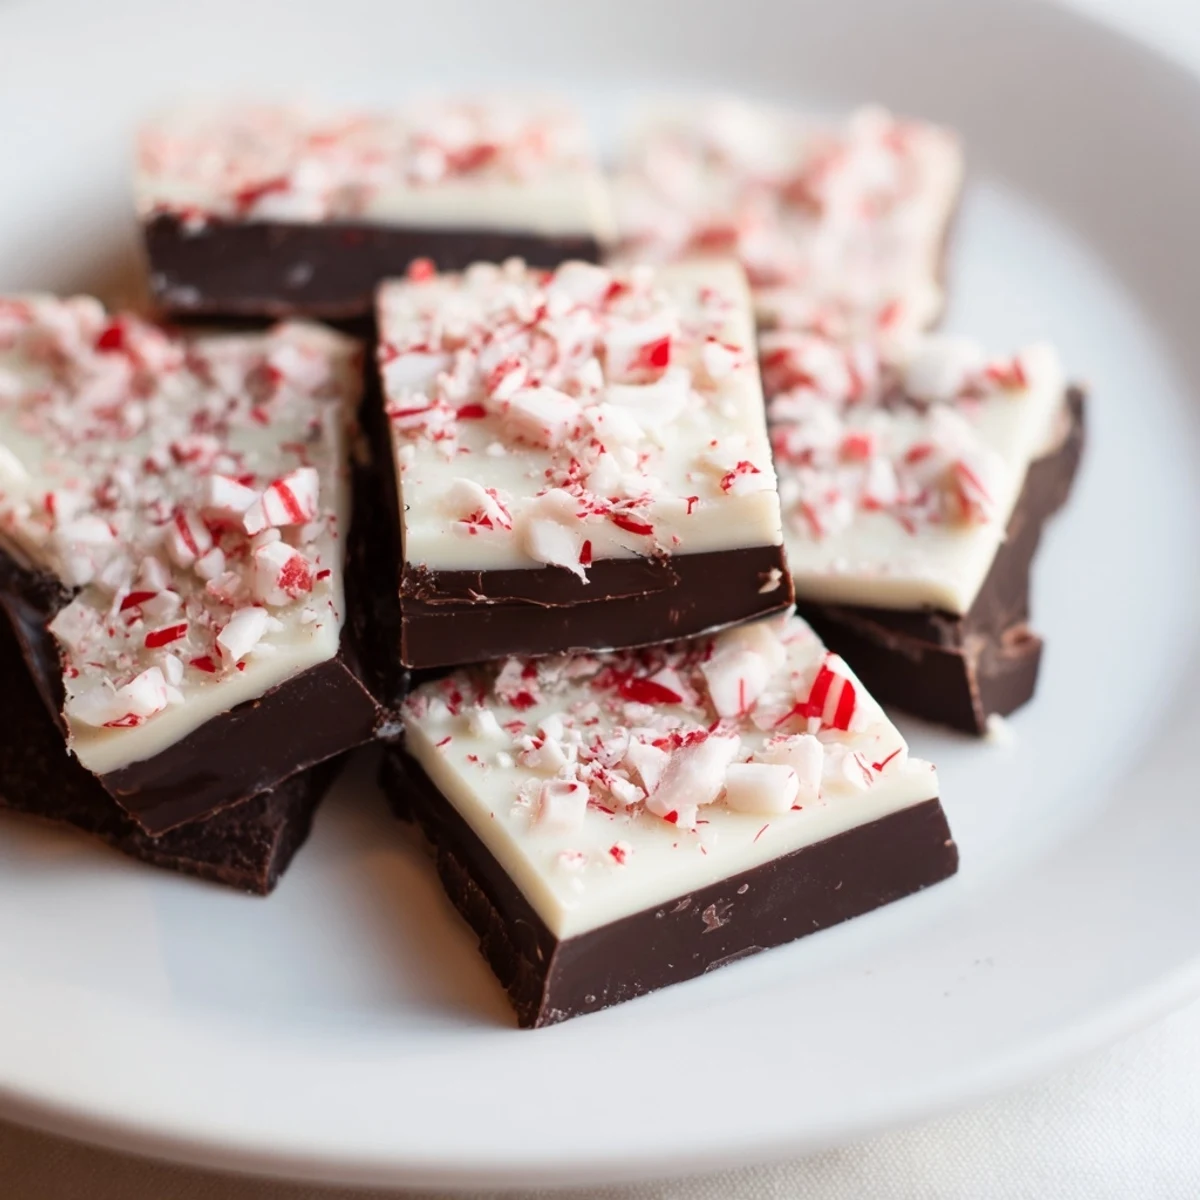
 This treat features smooth layers of semi-sweet and white chocolate, chilled for perfect texture, and garnished with crushed peppermint candies for a refreshing finish. Simple steps include melting chocolate gently, layering carefully, and chilling until set. Great for festive occasions and easy to prepare, it offers a balance of rich chocolate flavor and minty brightness. Store in a cool place for lasting freshness and enjoy as bite-sized pieces for sharing.
I still remember the first time I made peppermint bark in my tiny apartment kitchen during my first winter away from home. My roommate came through the door, shook snow from her coat, and the smell of melting chocolate mixed with crushed peppermint filled our small space. That moment—watching her face light up when she tasted that first piece—became my favorite holiday memory. Now, every December, I find myself back at the stove, layers of chocolate and candy canes calling me home.
I made a batch for my neighbor last year when she was going through a rough time. She told me later that she'd saved one piece in a tin for two weeks because it was too pretty to eat. When she finally did eat it, she cried a little and said it was exactly what she needed. That's when I understood that peppermint bark isn't just candy—it's a little gift of comfort.
Ingredients
- Semi-sweet or dark chocolate, chopped (200 g / 7 oz): This is your foundation, the deep voice in a choir. I learned the hard way that quality matters here—cheap chocolate can taste waxy. Chop it roughly; the pieces melt more evenly than chocolate chips, which contain stabilizers that make layering trickier.
- White chocolate, chopped (200 g / 7 oz): The bright counterpoint. White chocolate is more temperamental than dark chocolate because it burns easily and contains more cocoa butter. Chopping it yourself from a bar (rather than using chips) gives you better control and creamier results.
- Peppermint candy canes or hard peppermint candies, crushed (6–8 pieces, about 1/2 cup): The soul of the recipe. Use real peppermint candies, not artificial-tasting ones. I crush mine in a zip-top bag with a rolling pin because it's less messy than a food processor, and you get some larger shards mixed with fine powder, which creates better texture.
Instructions
- Set up your workspace:
- Line your baking sheet with parchment paper. This is your safety net—it prevents sticking and makes cleanup feel almost noble. I use a 9x13 inch sheet because it gives you nice, snappable pieces that aren't too thin.
- Melt the dark chocolate with patience:
- Use a double boiler—a heatproof bowl set over simmering water—or microwave in 30-second bursts, stirring between each one. The water should barely simmer; too hot and you'll seize the chocolate into a grainy mess. You'll know it's ready when it's glossy and smooth, with no lumps hiding at the bottom of the bowl.
- Spread the first layer:
- Pour the melted dark chocolate onto your parchment paper and use a spatula to spread it evenly to about 1/4 inch thickness. Don't overthink this—it doesn't need to be perfect. The peppermint will forgive small imperfections. Pop it into the fridge for 15 minutes. This is when you can crush your candies without rushing.
- Melt and cool the white chocolate:
- While the dark chocolate sets, melt your white chocolate using the same gentle method. This is crucial: let it cool for a minute or two before pouring. If you pour hot white chocolate onto the cold dark layer, you're asking for trouble—the heat will soften it unevenly and your layers won't stay distinct.
- Add the white chocolate layer:
- Remove the tray from the fridge and pour the slightly cooled white chocolate over the set dark layer. Spread gently and evenly. You're not trying to obliterate the layer beneath; you're adding a cloud on top of the night sky.
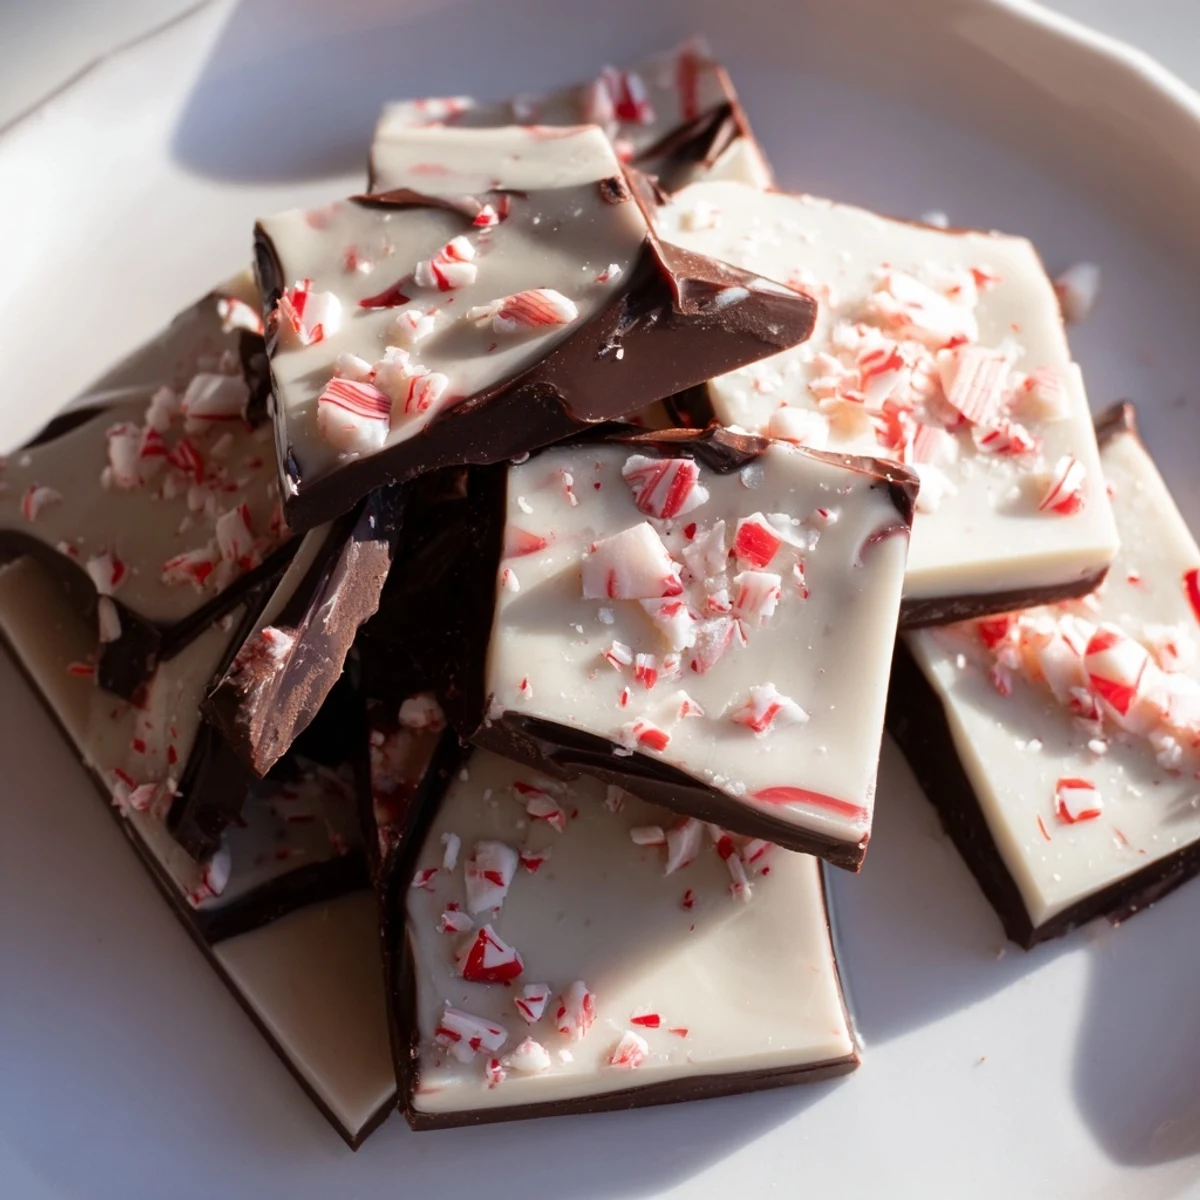
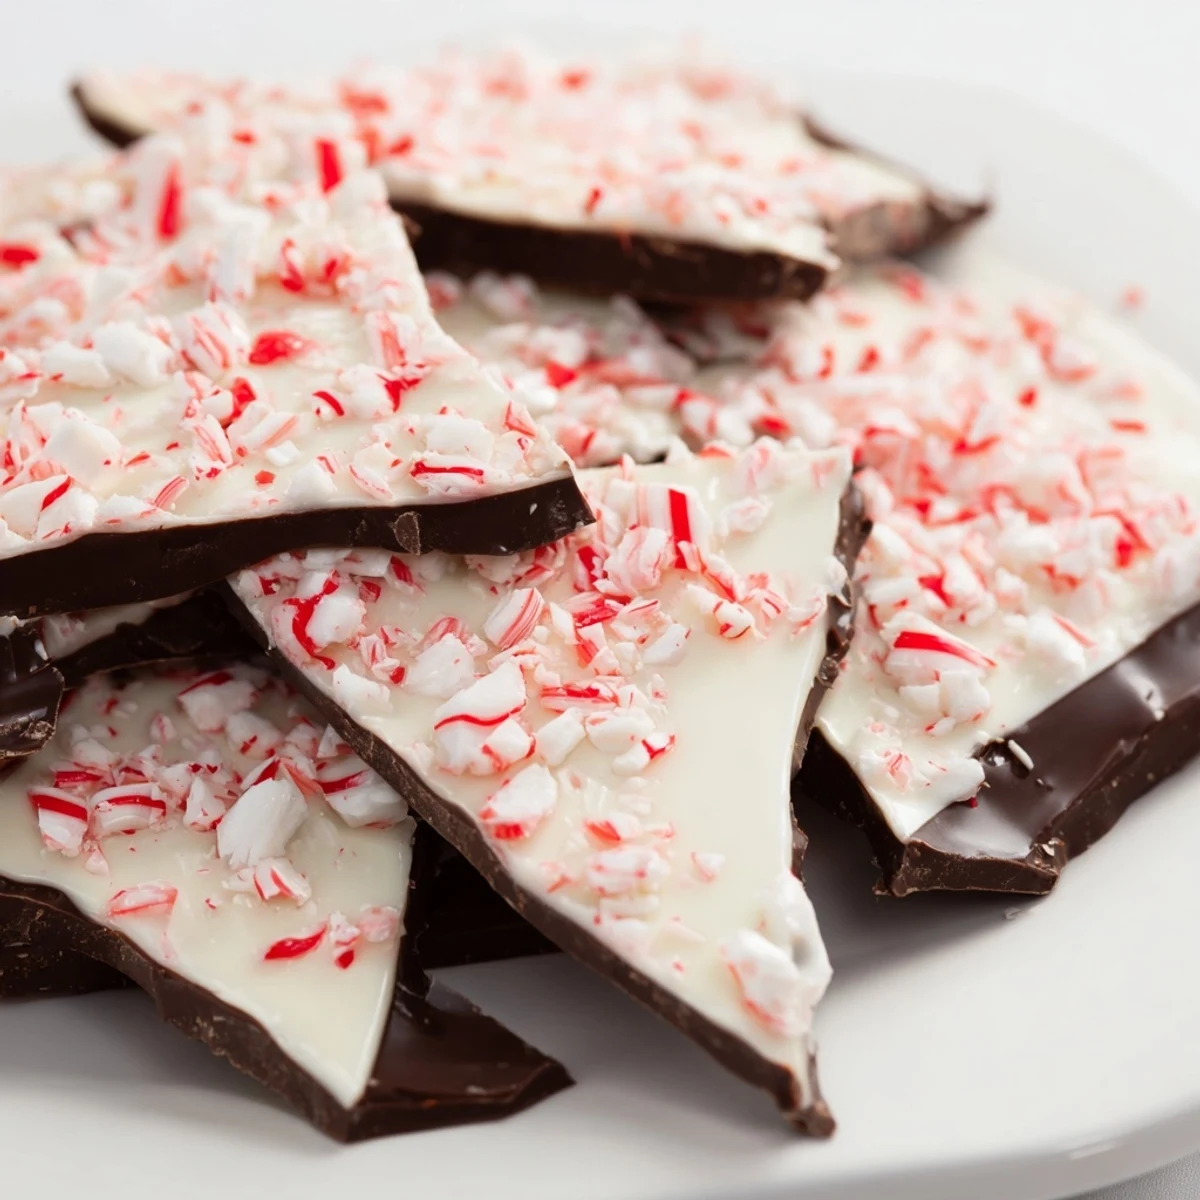
- Crown it with peppermint:
- Here's the magic moment. Immediately sprinkle your crushed peppermint candies over the white chocolate while it's still soft and slightly tacky. Press them in gently with your fingertips. The white chocolate will grip them as it sets, and you get these beautiful pockets of red and white against creamy white.
- Chill until set:
- Refrigerate for at least 30 minutes. I usually do 45 minutes because I'm impatient and I'd rather wait and break into fully set bark than bite into something that's still slightly soft.
- Break into pieces:
- Remove from the fridge and let it sit at room temperature for 2–3 minutes to make breaking easier. You can snap it by hand into rustic shards, or use a sharp knife to cut neat squares. Either way feels intentional.
 Pin Recipe
 My sister brought a box of my peppermint bark to her office holiday party, and apparently it became legendary—people were asking for pieces for weeks after. One colleague even asked for the recipe to impress her own family. I loved that my kitchen moment became part of someone else's story.
Flavor and Texture Variations
Once you've made the basic version, you'll start hearing the whispers of possibility. For a marbled effect, layer both chocolates and gently swirl them together with a toothpick before the white chocolate sets completely—it looks almost stained-glass like and tastes just as elegant. If you want deeper peppermint flavor, add 1/4 teaspoon of pure peppermint extract to the melted white chocolate; it blooms on the palate in the most satisfying way. I've also experimented with adding a pinch of sea salt to the top layer—it makes the peppermint sing and adds sophistication. One winter, I tried dark chocolate on top and white on bottom and reversed the visual entirely. The joy is in making it your own.
Storage and Gifting
Peppermint bark is made for giving. Once it's fully set, store it in an airtight container in a cool place (not the fridge—temperature swings can cause the chocolate to bloom) for up to two weeks. If you're gifting it, layer pieces between parchment in a decorative tin or box. I've wrapped individual pieces in small squares of cellophane and twisted the ends with red ribbon—it looks like something from a specialty shop, but it took five minutes. People always think you spent way more time and care than you actually did, which feels like the best kind of kitchen magic.
Quality Ingredients and Final Thoughts
I've learned that using real peppermint candies and good-quality chocolate isn't just snobbery—it's the difference between candy that tastes like peppermint and candy that tastes like that memory of walking through a winter market near real evergreens. Cheap chocolate has a waxy finish and can taste bitter or oddly metallic. Good chocolate tastes like itself and lets the peppermint shine.
- Buy chocolate from a brand you trust and taste it before you start cooking—if you wouldn't eat it plain, don't use it as your base
- Always chop chocolate from bars rather than using chips; the stabilizers in chips interfere with layering and texture
- If you make a mistake (chocolate seized, peppermint got soft), you can always melt it all together and make chocolate peppermint bark crumbles to sprinkle over ice cream instead
 Pin Recipe
 Every time I make this, I think of all the kitchens where it's being made right now—people crushing candies, spreading chocolate, creating something small and delicious that somehow feels sacred. That's the real gift of peppermint bark.
Recipe FAQs
- → What type of chocolate works best for layers?
-
Use good quality semi-sweet or dark chocolate for the bottom layer and creamy white chocolate for the top to ensure smooth melting and rich flavor.
- → How can I crush peppermint candies easily?
-
Place peppermint candies in a zip-top bag and gently use a rolling pin to crush them into small pieces for even topping.
- → Can I add peppermint extract for more flavor?
-
Yes, adding about 1/4 teaspoon of peppermint extract to melted chocolate boosts mintiness without overpowering.
- → How long should the layers chill before adding the next?
-
Chill the first chocolate layer about 15 minutes until firm before adding the white chocolate and the peppermint topping.
- → What’s the best way to store the pieces?
-
Keep pieces in an airtight container in a cool, dry place for up to two weeks to maintain freshness and texture.
