 Pin Recipe
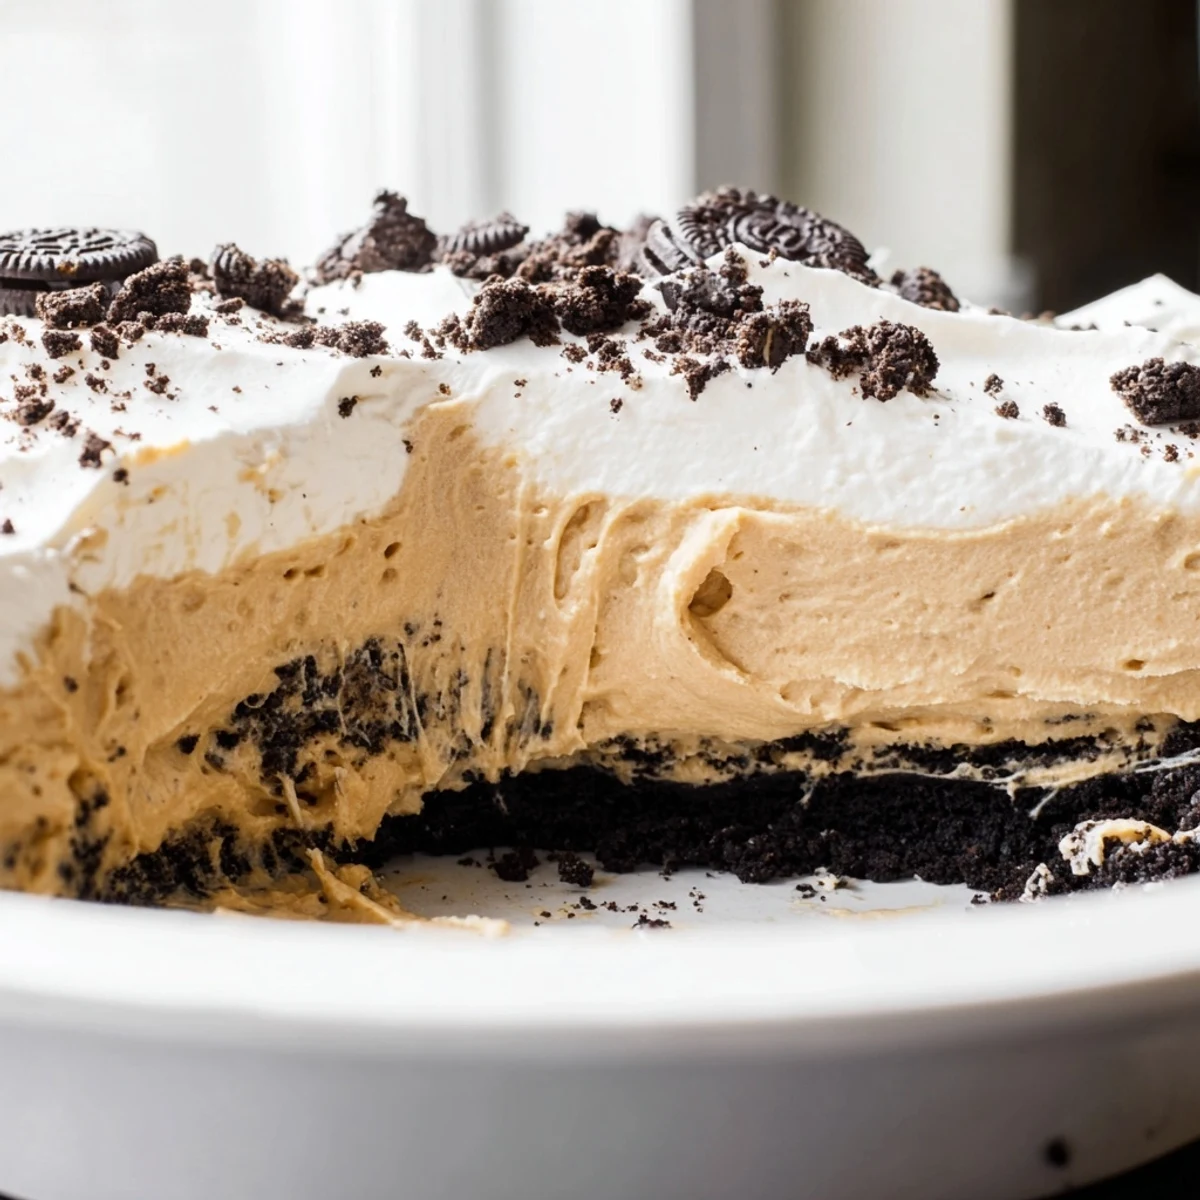
 This decadent dessert layers velvety peanut butter cream filling inside a buttery chocolate Oreo crust. The filling combines creamy peanut butter with smooth cream cheese and freshly whipped heavy cream for an incredibly light yet indulgent texture. After chilling until set, the creation gets crowned with sweetened whipped cream and generous handfuls of crushed Oreo pieces for that perfect crunch contrast.
The entire process takes just 20 minutes of hands-on preparation before chilling, making it an ideal make-ahead treat for gatherings. Each slice delivers the irresistible combination of salty-sweet peanut butter and chocolate sandwich cookies that everyone loves.
The first time I made this pie was actually by accident—I had leftover Oreos from a party and an extra jar of peanut butter sitting in the pantry. My cousin walked into the kitchen, saw me crushing cookies into butter, and said "that's either going to be terrible or genius."
I brought this to a friends birthday last summer and her brother—who typically skips dessert—went back for a second slice before anyone else had even finished their first. Someone actually asked if I'd sell them the recipe, which I took as the highest compliment possible.
Ingredients
- Oreo cookies: The filling inside the cookies is essential for the crust texture, so dont scrape it out
- Unsalted butter: Melt it completely so every crumb gets coated and presses together like a dream
- Creamy peanut butter: Room temperature makes it so much easier to blend smoothly
- Cream cheese: Let it soften fully or you'll end up with tiny lumps in your filling
- Powdered sugar: Sift it first to avoid any grainy surprises in the final texture
- Heavy whipping cream: The secret to that cloud-like texture that makes this pie unforgettable
Instructions
- Build that chocolate crust:
- Crush the Oreos in a food processor until they're fine and sandy, then stir in the melted butter until everything clumps together when you squeeze it. Press the mixture firmly into your pie dish, making sure the sides are even and slightly thicker at the bottom edge.
- Bake and cool the crust:
- Bake at 350°F for 10 minutes—this sets the crust so it doesn't fall apart when you slice the pie later. Let it cool completely before adding any filling.
- Whip up the creamy base:
- Beat the peanut butter and cream cheese until they're completely smooth and no streaks remain. Mix in the powdered sugar until it disappears, then whip the heavy cream in another bowl until stiff peaks form.
- Combine it all:
- Fold the whipped cream into the peanut butter mixture gently—this step takes patience but keeps everything light and airy. Spread the filling over your cooled crust and refrigerate for at least two hours.
- Add the finishing touches:
- Whip the remaining cream with powdered sugar until it holds its shape, then pile it on top of the chilled pie. Crush a few extra Oreos and sprinkle them over the whipped cream for that perfect finish.
 Pin Recipe
 This pie has become my go-to for potlucks because it travels well and people genuinely get excited when they see it coming out of the fridge. My roommate actually requested it for her birthday instead of a cake from a bakery.
Making It Your Own
One time I used crunchy peanut butter because it was all I had, and the little bits of crunch throughout the filling made it even more interesting. A friend of mine adds a layer of chocolate ganache between the crust and filling, which feels like overkill but somehow works perfectly.
Timing Tricks
I've learned to make the crust the night before and let it sit in the fridge—something about the flavors settling makes it taste even better. The filling needs those full two hours to set, but I promise it's worth the wait when you cut that first clean slice.
Serving And Storage
This pie is actually better after a full day in the fridge—the flavors meld together and the texture becomes even more luxurious. I use a warm knife to get perfect slices, running it under hot water and drying it between cuts.
- Leftovers keep for about four days if you cover them tightly
- Let slices sit on the counter for five minutes before serving—they taste better slightly softened
- The crust will gradually soften over time, but the flavor just gets richer
 Pin Recipe
 There's something almost magical about how simple this is to make compared to how impressive it looks coming out of the refrigerator. Every time I serve it, someone asks for the recipe before they've even finished their slice.
Recipe FAQs
- → How long does this need to chill before serving?
-
The pie requires at least 2 hours of refrigeration time for the peanut butter filling to set completely. For best results, you can make it the night before and let it chill overnight—the flavors develop beautifully, and the texture becomes even firmer and easier to slice.
- → Can I use crunchy peanut butter instead of creamy?
-
Absolutely! Crunchy peanut butter adds wonderful texture throughout the filling. The peanut pieces create a delightful contrast against the smooth cream cheese and whipped cream base. Just keep in mind that the final texture will have more crunch than the traditional silky version.
- → How should I store leftovers?
-
Store any remaining pie covered in the refrigerator, where it will keep fresh for up to 4-5 days. The whipped cream topping may start to soften after a day, so for the best presentation, consider adding the whipped cream garnish just before serving leftovers.
- → Can I freeze this for later?
-
You can freeze the assembled pie (without whipped cream topping) for up to 2 months. Wrap it tightly in plastic wrap and aluminum foil before freezing. Thaw overnight in the refrigerator, then add fresh whipped cream and crushed Oreos just before serving for the best texture and appearance.
- → What if I don't have a food processor for the crust?
-
No problem! Place your Oreos in a large resealable plastic bag, seal it, and crush the cookies into fine crumbs using a rolling pin, meat mallet, or the bottom of a heavy pan. This hands-on method works just as well and is actually quite satisfying.
- → Can I make this gluten-free?
-
Yes! Simply substitute regular Oreos with a certified gluten-free chocolate sandwich cookie brand. The rest of the ingredients (peanut butter, cream cheese, butter, whipping cream) are naturally gluten-free, making this an easy adaptation for those with gluten sensitivities.
